Integrate Google Home into the Droplit System
Configure Droplit Google Home Integration
- On the Droplit portal, go to the Integrations tab.
- Under "Platforms", select Google Home.
- Select Install to install the conduit.
- Since information from the portal will be needed to configure the Google Home Action, be sure to keep it open.
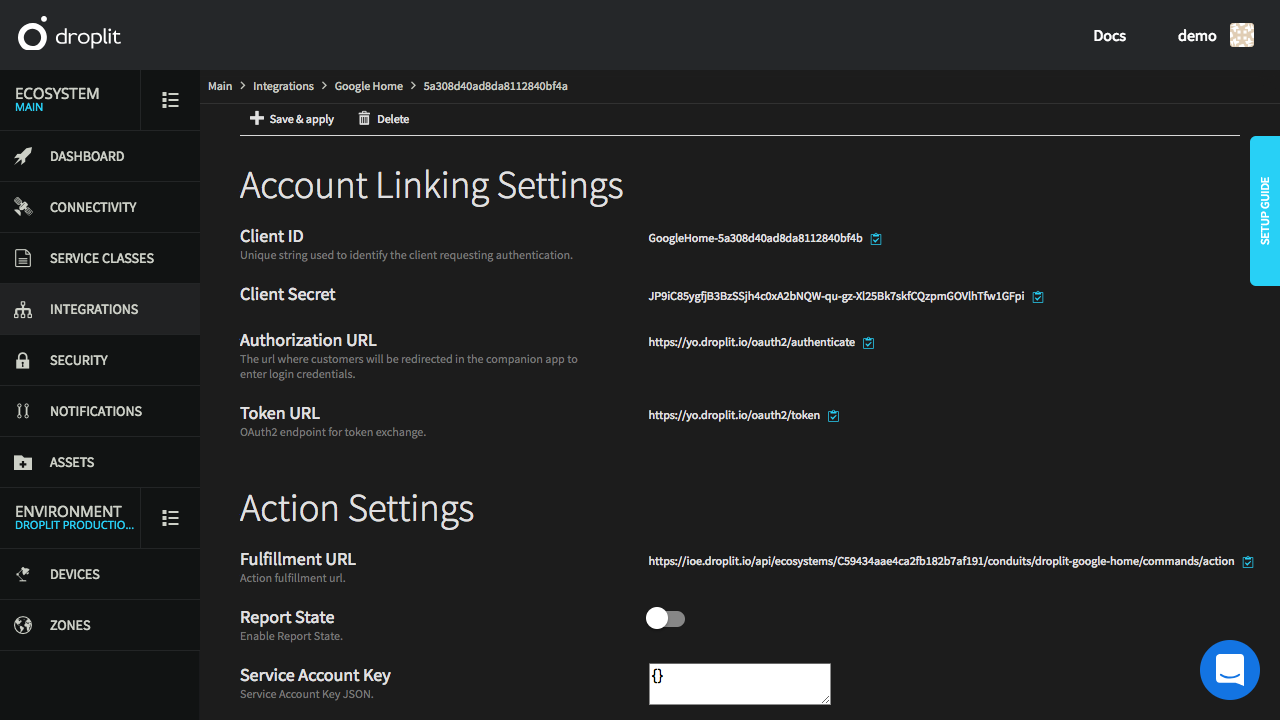
The Google Home Integration page on the Droplit portal as it initially appears.
Configure Google Home Action
- Sign into the Google Actions console using a Google account.
- Select Add/import project.
- Name it after your company with regard to Droplit.
NOTE
The name of the project will not be public, and it should not just be the name of your company.
- Select the category Home control, and select the project type Smart home.
- Be sure to fill in the other sections as they pertain to you. Droplit-specific configuration is only present in the Account Linking and Actions sections.
Account Linking
- Select Account Linking toward the bottom of the sidebar under "ADVANCED OPTIONS".
- Under "Account creation", select: No, I only want to allow account creation on my website
- Linking type: OAuth.
- Grant Type: Authorization Code.
- Client ID, Client Secret, Authorization URL, and Token URL are all copied from the Google Home Integrations page on the Droplit portal.
- No scopes are necessary for this setup, so the "Scopes" field may be left blank.
- The "Testing Instructions" field may be filled out as you see fit.
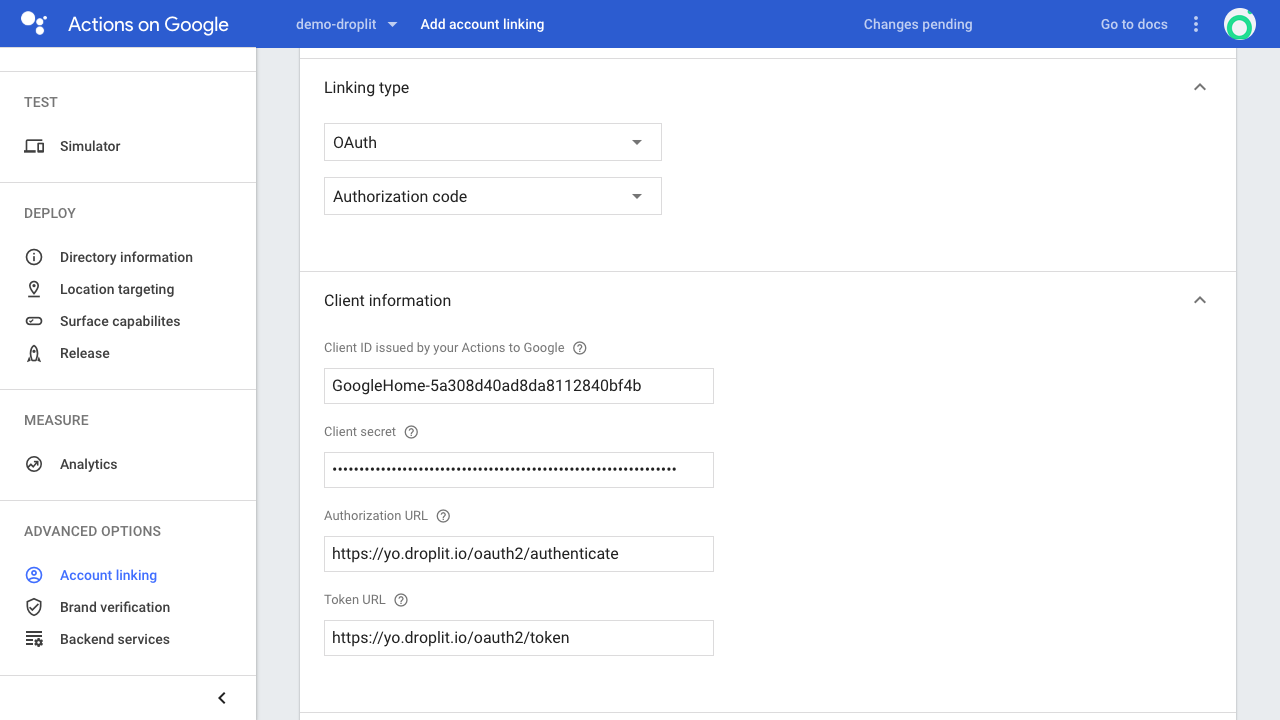
The "Client information" part of the "Account linking" section where all of the fields are properly populated with data from the Droplit portal.
Actions
- Select Actions from the sidebar under "BUILD".
- Select ADD YOUR FIRST ACTION.
- Copy the "Fulfillment URL" from the Google Home integration configuration page on the Droplit portal, and paste it into the "Add fulfillment URL" field on the Actions page.
- Select DONE.
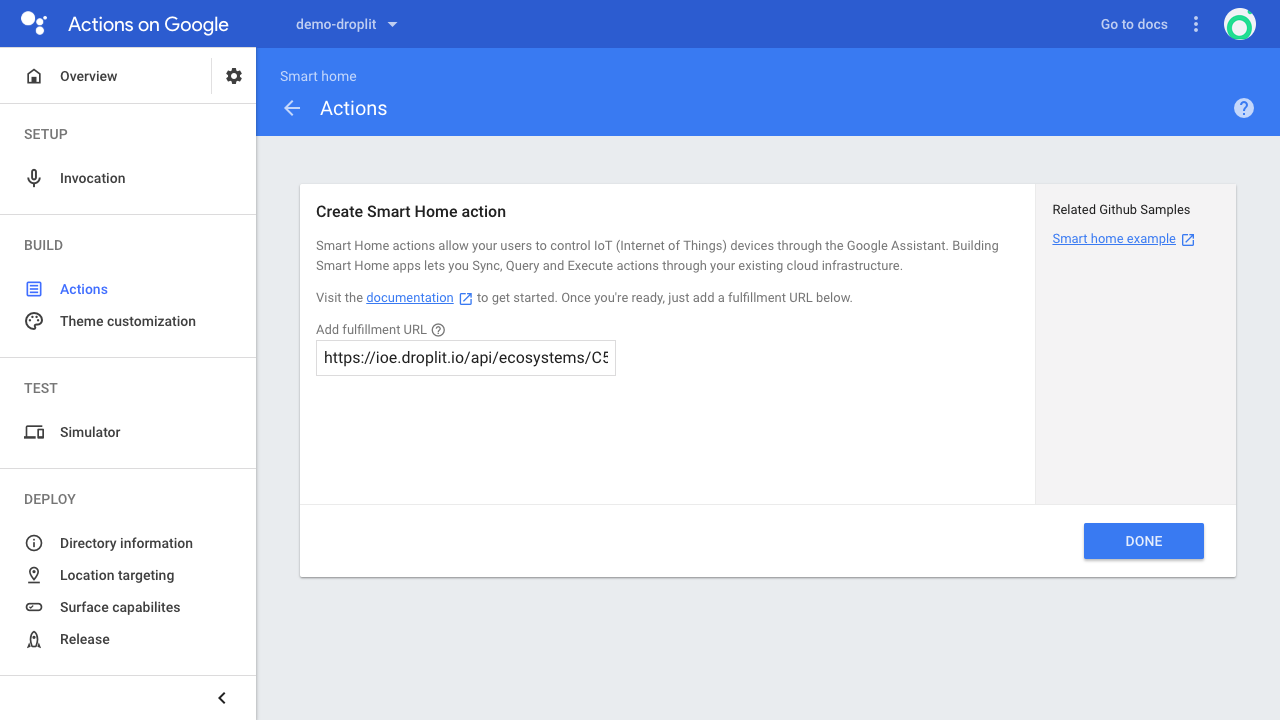
The new action's page with the fulfillment URL correctly copied from the Droplit portal.
WARNING
When testing the action, changes will not take effect until the TEST button is selected for the Droplit action on the Actions tab.
Google Home Features Supported by Droplit
Report State
Implementing Report State allows a device to report its state to Google's Home Graph rather than wait to be queried by the Google Home. This expedites the execution of Google Home commands because only the Home Graph needs to be referenced rather than waiting for several independent queries to be resolved. A device is configured to report its state whenever one of its service properties changes. For more information, see Google's documentation on Report State. Follow the below instructions to enable Report State.
Create New Google Cloud Project
- Login to Google's Cloud Console.
CAUTION
When following the link to the Cloud Console, ensure that you are logged into the same Google account with which the action was created.
- Create a project by selecting NEW PROJECT from the dropdown on the top menu bar.
- Navigate to the new project's page.
- Under the "APIs" section, select Go to APIs overview.
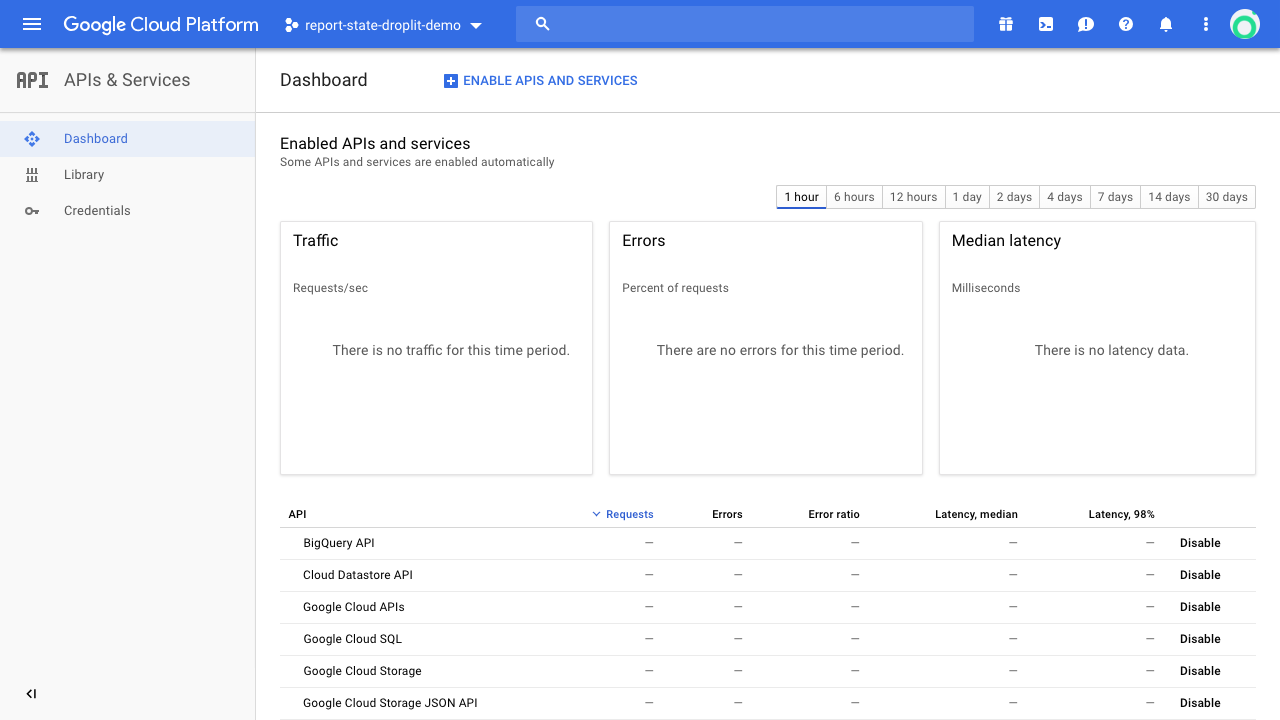
The dashboard of the API page for the newly created Google Cloud project.
Enable the Home Graph API
- From the dashboard, select ENABLE APIS AND SERVICES.
- Go to the HomeGraph API page, and select ENABLE.
CAUTION
When following the link to the HomeGraph API page, ensure that you are logged into the same Google account with which the project was created and that the correct project is selected.
Establish Credentials
- From the APIs & Services menu on Google's Cloud Console, select Credentials.
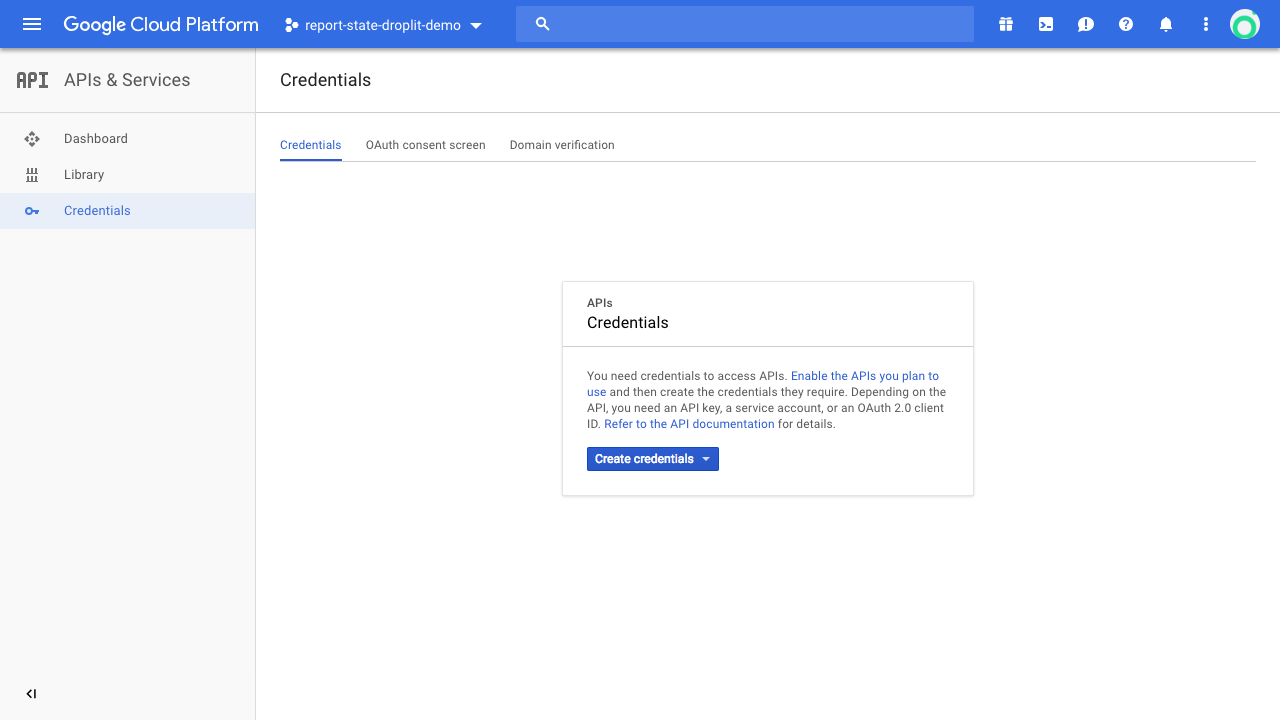
The "Credentials" tab on the API page for the project.
- Select Create credentials, then select Service account key.
- Select a service account, or create a new one:
- Select a "Service account name" that best pertains to your needs.
- For "Role", select Security Review under "IAM" from the dropdown menu.
- For "Key type", select JSON.
- Select Create.
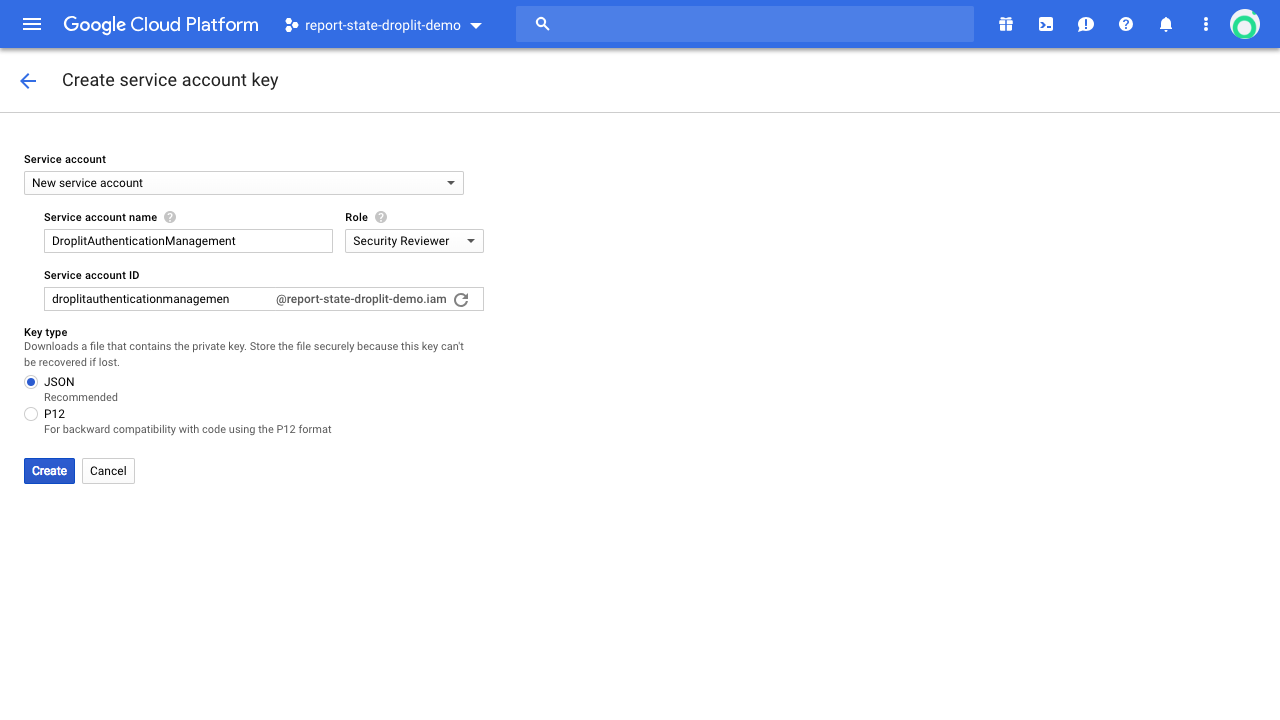
The "Create service account key" page filled out with sample information for creating a new service account.
Enable Report State
- Copy the raw data of the newly downloaded JSON object; it contains the created credentials.
- On the Droplit portal, navigate to the Google Home Integration page.
- Enable Report State.
- Paste the copied JSON object into the "Service Account Key" field, and select Save & apply.
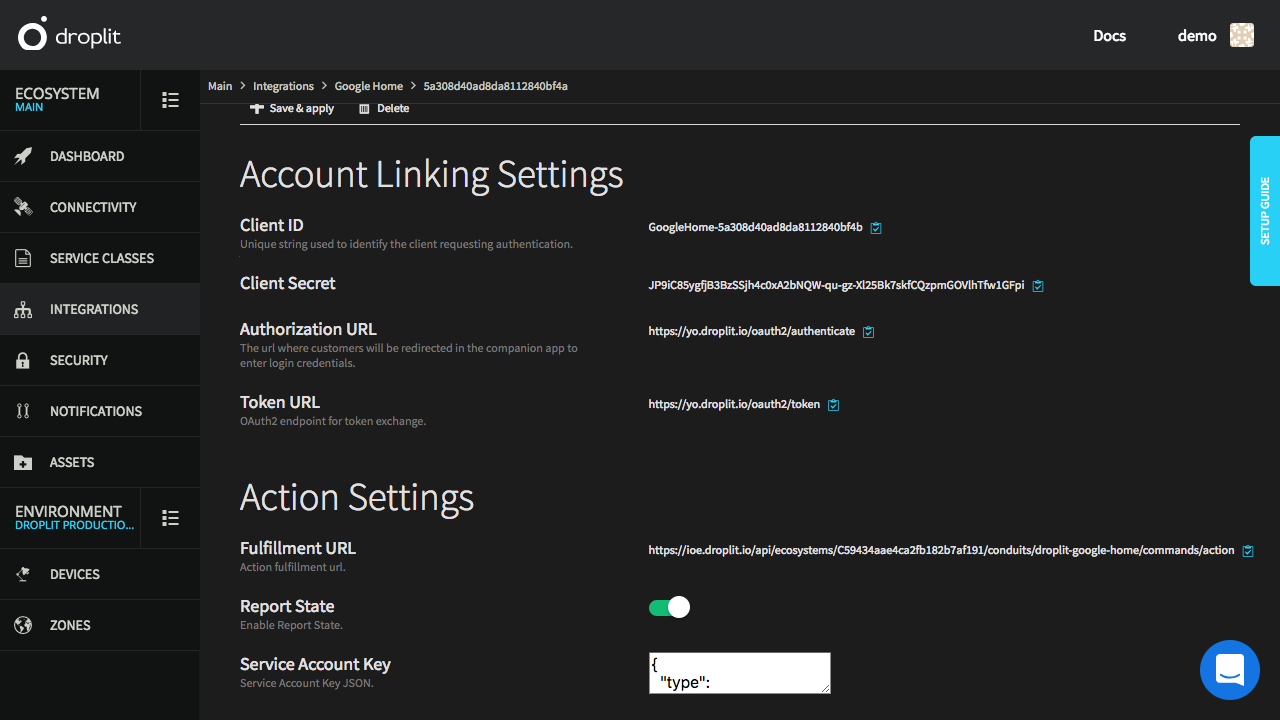
The Google Home Integrations page on the Droplit portal with all of the fields correctly filled out for enabling report stare functionality.
SYNC Request
A SYNC Request asks Google to send a SYNC call to all devices associated with the identifier sent in the request. This enables a user's devices to be updated without having to unlink and relink their account. A SYNC request is made whenever a device is created, updated, or deleted within the environment in which the Google Home conduit has been activated. More information can be found on Google's documentation for Request Sync.
FAQ
Set the logo of an Action
- Login to Actions on Google.
- Select the desired Action.
- Under the "DEPLOY" section of the sidebar, select Directory information.
- Select Images.
- Select the photo icons to upload the desired images, as shown below.
- Once the desired photos are uploaded, select SAVE.
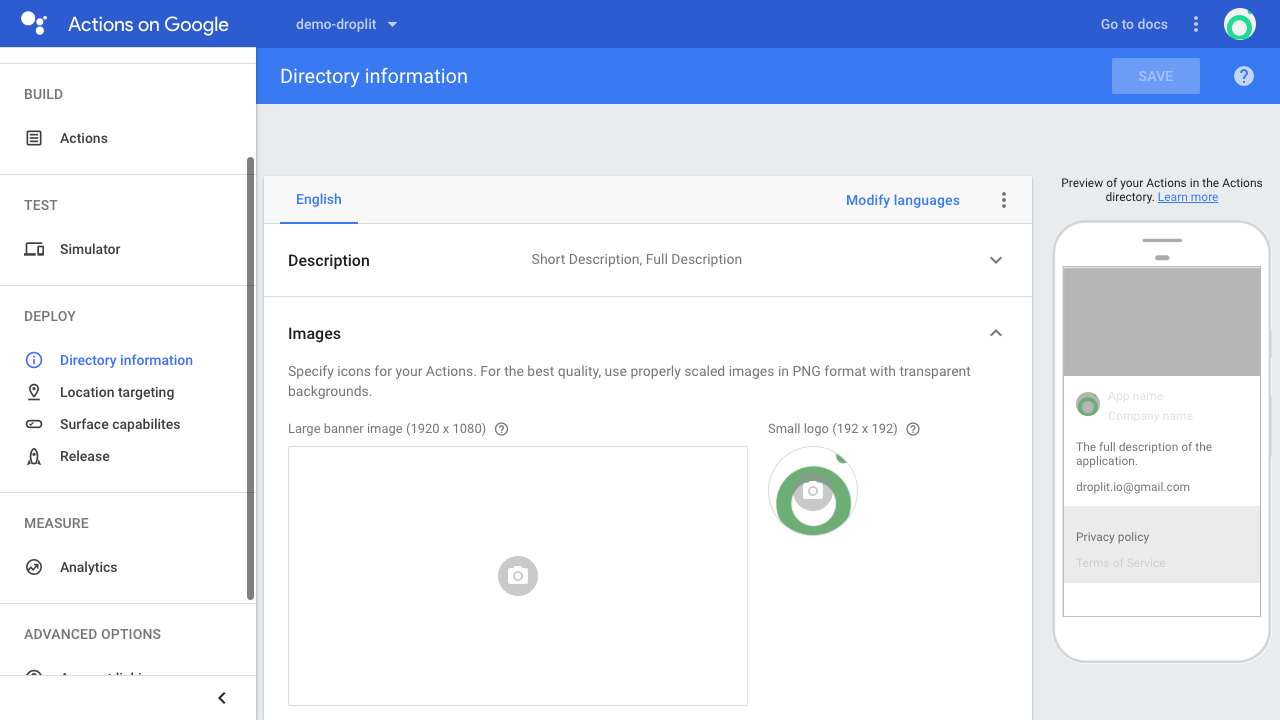
The "Images" section of the "Directory information" tab on the sidebar with the Droplit logo saved into the "Small logo" category.
