Integrate an Auth0 client with the Droplit Auth0 conduit.
Install the Auth0 Conduit on the Droplit Portal
- Login to the Droplit portal.
- Navigate to Security, and select Auth0.
- Select Install.
- Open a new tab before moving on to the next section; information will be both entered into and extracted from the portal.

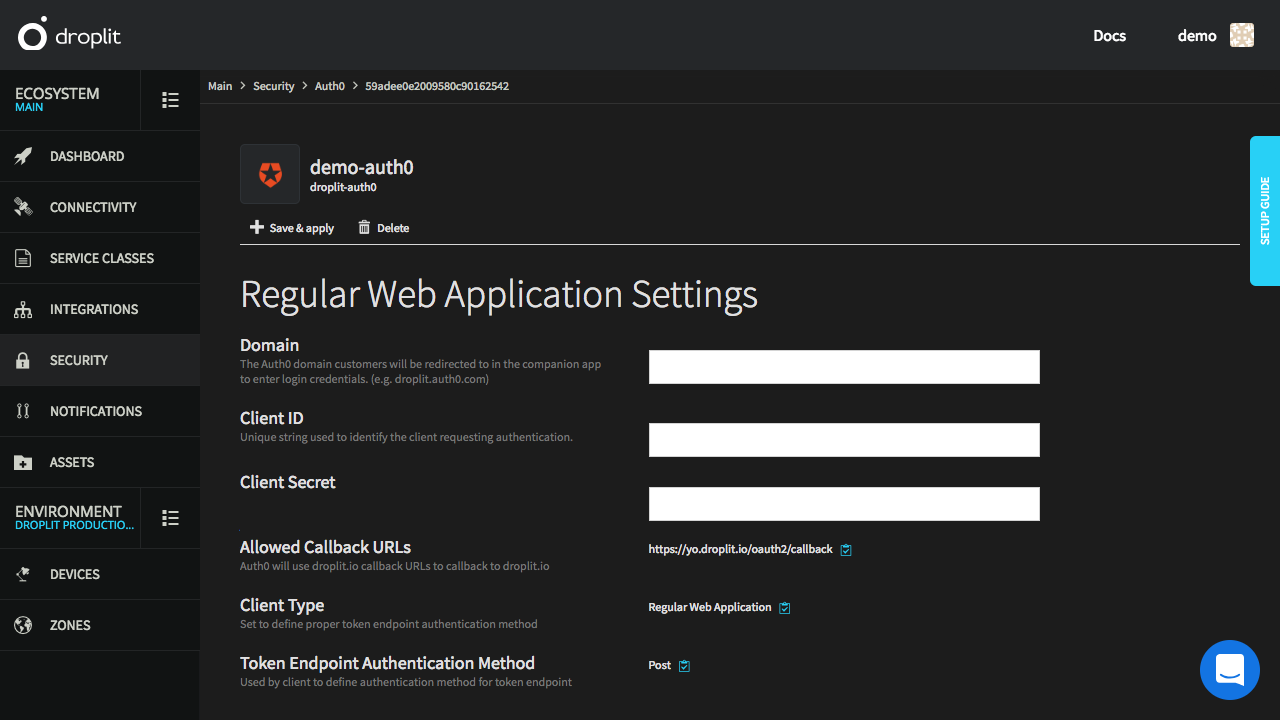
The page for the Auth0 conduit on the Droplit portal immediately after it is first installed.
Create an Auth0 Client
- Login to the Auth0 management portal.
- In the sidebar, select Applications.
- Select CREATE APPLICATION.
- Enter an appropriate name for the application, select Regular Web Applications, and select CREATE.
- Within the configuration page of the new application (Applications > demoApp), select the Settings tab.
- Set the Token Endpoint Authentication Method to
Post, just as it says in the portal. - From the Droplit portal, copy the "Allowed Callback URLs", and paste them into the "Allowed Callback URLs" field on the Auth0 page.
- Select SAVE CHANGES at the bottom of the page.

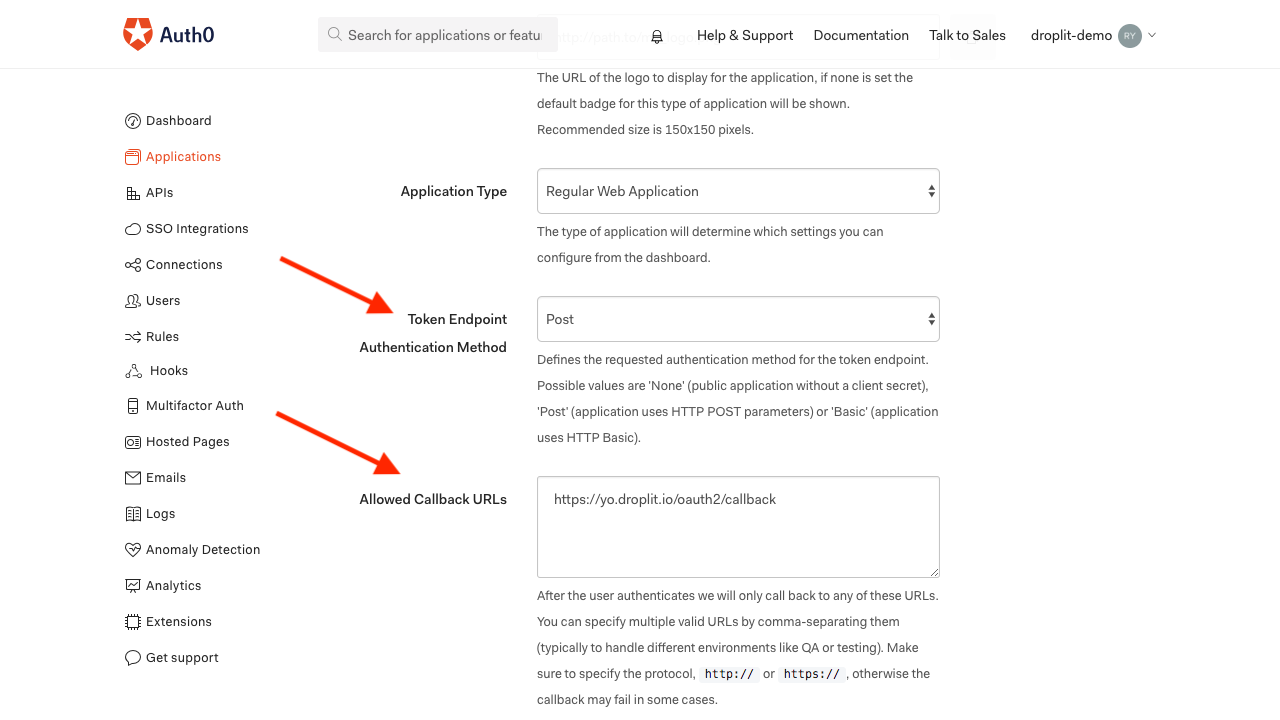
The "Token Endpoint Authentication Method" and "Allowed Callback URLs" fields correctly filled in with the information from the Droplit portal.
(Optional) Enable Service Providers
Enabling service providers allows users to authenticate with third party services, such as Facebook or Google.
- In the sidebar, select Connections, then, from the dropdown, select Social.
- Enable providers as you wish, configuring each one.
Integrate Auth0 With Droplit
- Within the configuration page of the new application (Applications > demoApp), select the Settings tab.
- Copy the Domain, Client Id, and Client Secret from the Auth0 application page to their corresponding fields for "Regular Web Application Settings" in the Auth0 Integration page on the Droplit portal.

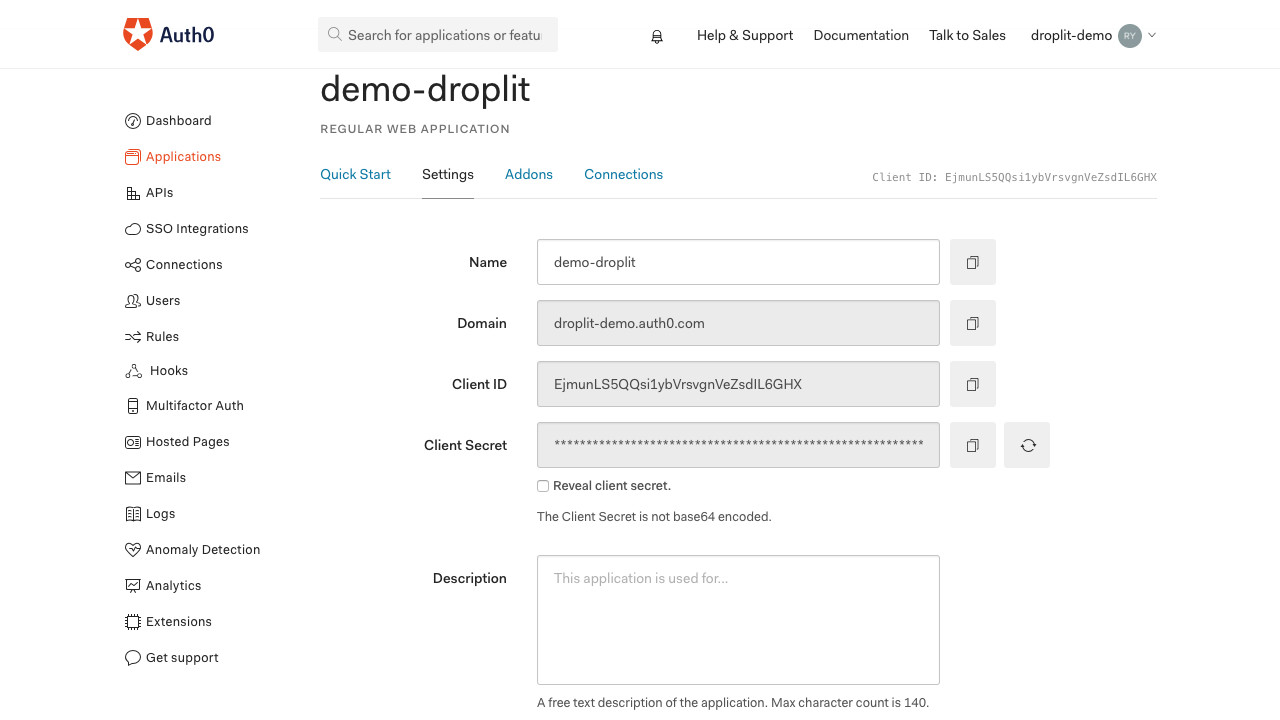
The Auth0 application page containing the information needed by the Droplit portal.
- On the Droplit portal, select Save & apply.

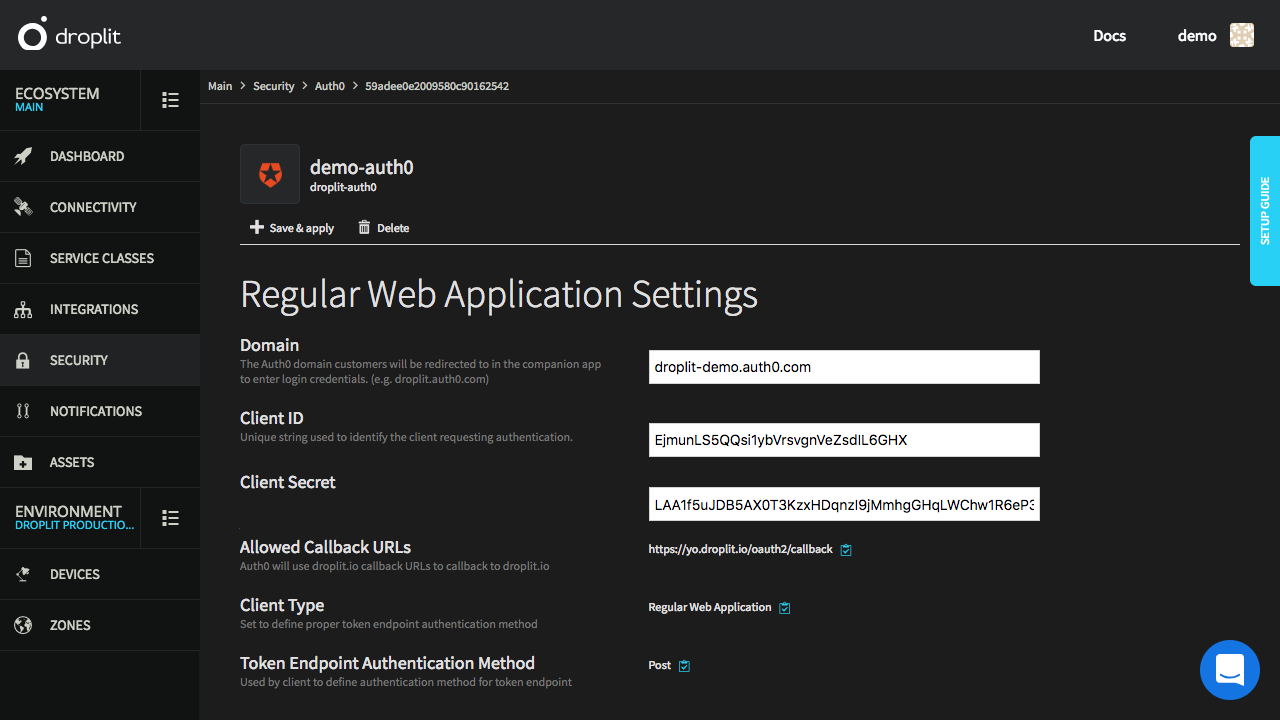
The Auth0 Integration page on the Droplit portal with the fields properly filled out.
